The Amazing Slow Downer - slow down and loop recordings of the music you are learning ($)
The Strum Machine - customizable backing tracks with guitar, bass, and mandolin. Great for fiddle tunes.
The Session.org - a favorite international tune source

Studio Performing at
Hands of Heartland Luncheon

Carp Celtic Jam Tune Book - A favorite tune source in Omaha
Pop Wagner, cowboy-fiddler house concert & workshops
The Toneway Project for Fiddle - learn to jam
Oldtimejam.com - play along backing tracks
Berea College Special Collections and Archives- Authentic audio and video files for OT tunes
The Fiddle Chix
Mondays 6:45 - 7:45pm
Adult Group
Social fiddle tune group that enjoys performing - level Bk 2/3+
Contact Mindy at 402.320.7597 for more information
Atelier - a violin shop with detailed page about violin care


Christmas Caroling At
Senior Living Centers
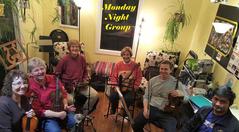
Monday Night Group - 8:00pm - 9:00pm
Advanced group playing classical violin duets, fiddle music and exploring technique - Level Bk 4/5+
Mondays at 8pm all students are welcome.
Contact Mindy at 402.320-7597 for more information
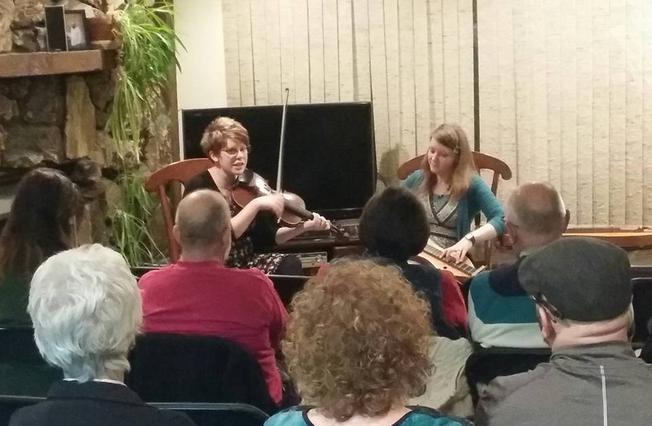
Scenic Roots House Concert
after Workshops hosted by
Big Muddy Fiddle Club
Mindy's Violin & Fiddle Omaha

Studio
Announcements
Local Organizations
Heartland Philharmonic Orchestra - UNO & Community
Orchestra Omaha - Community Orchestra
Practicing
Instrument Care
Playing Violin & Fiddle
Accessories
Apps
Look for free or inexpensive apps that do the following: Chromatic Tuner, Metronome, Ear Training Games, blank staff paper
Also Check out:
Finale Notepad - Free basic music notation software
Audacity - Free audio editor
Fiddle Tunes For Free
Celtic Tunes
Old Time Tunes
Scandinavian Fiddle Tunes
Klezmer Tunes
Other Fiddle Styles
Fiddle Jam Institute - Gypsy Jazz, Blues + more . . .
Good Stuff - Links You May Not Have Known You Needed This Much!
Lessons
45 minutes
$40.00/lesson
paid monthly
Location
1323 S 51st Street
Omaha NE 68106
Aksarben Area
Member American String
Teachers Association
Nebraska Chapter
Studio open:
Monday - Thursdays
5:30pm - 9:30pm